Running Vitis AI with the Kria Starter Kit
Environment construction 1 (launch existing image of Petalinux)
Release date: January 5, 2023
In this article, we will start Petalinux on KV260 and check access to it, as Xilinx provides a Petalinux image for KV260, which is ready to perform AI inference with a trained AI model (xmodel) for KV260. We use this Petalinux image.
Table Of Contents
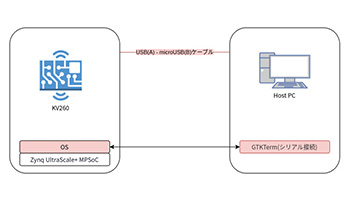
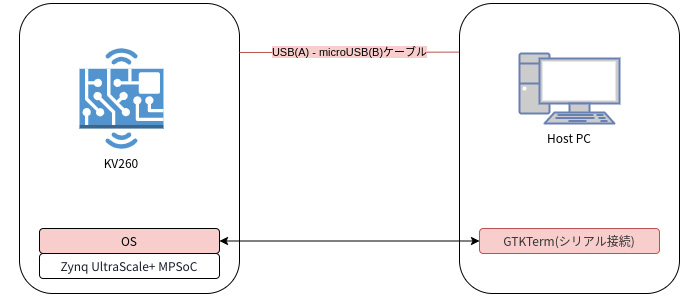
Configuration Diagram
The configuration diagram is as follows. The colored areas are the corresponding parts of this article.
What Is Petalinux?
Petalinux is a framework for building a Linux distribution for Xilinx devices.
The Petalinux image in this article is a Linux image built with Petalinux. While it is possible to create a custom Linux image using Petalinux, this article will use Xilinx's pre-built image to explain.
Xilinx Account Creation
You may be asked to sign in during various downloads.
Please register from the Xilinx
Petalinux Image Preparation
Download the Petalinux image from below.
The image is in Step 2 of the Introduction To Vitis-Ai
Vitis-AI prepared image for 2022
Extract the downloaded xilinx-kv260-dpu-v2022.1-v2.5.0.img.gz below.
gzip -d xilinx-kv260-dpu-v2022.1-v2.5.0.img.gzThe image will be used from xilinx-kv260-dpu-v2022.1-v2.5.0.img
Exporting Petalinux images with the tool
Also used on Xilinx page balenaEtcher to be used. Get the application below.
- Access https://www.balena.io/etcher/
- Press Download for Linux x64 to download
- Unzip the file : unzip balena-etcher-electron-1.7.9-linux-x64.zip
Generated balenaEtcher-1.7.9-x64.AppImage is the export application.
* At the time of writing, 1.7.9 is the latest version.
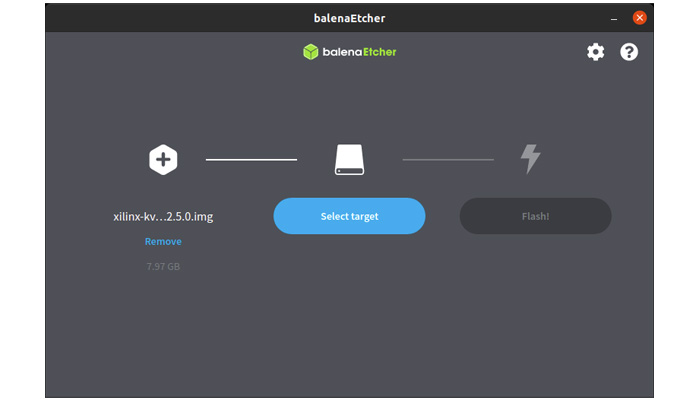
Double-click balenaEtcher-1.7.9-x64.AppImage to launch it, and follow the steps below to export it.
Click on Flash from file and select the xilinx-kv260-dpu-v2022.1-v2.5.0.img
* Please change the selection file when writing other images
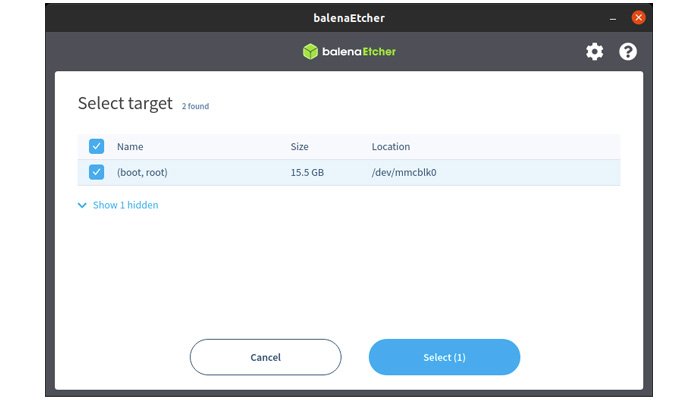
Click Select target to select the target SD card.
*The system drive is not selectable, but please check just in case!
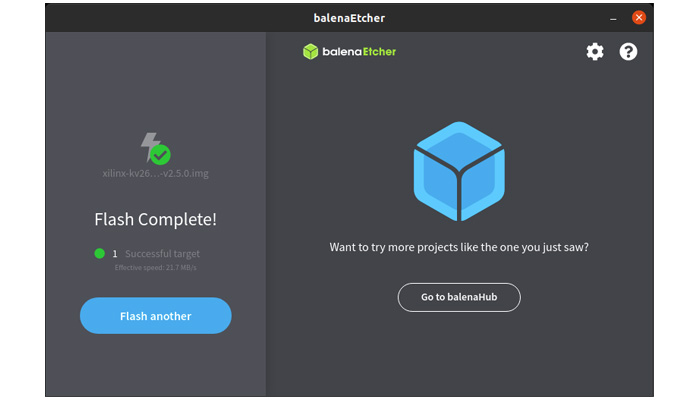
Click "Flash!" and wait until the export is complete. If successful, the following screen will appear.
Serial Connection
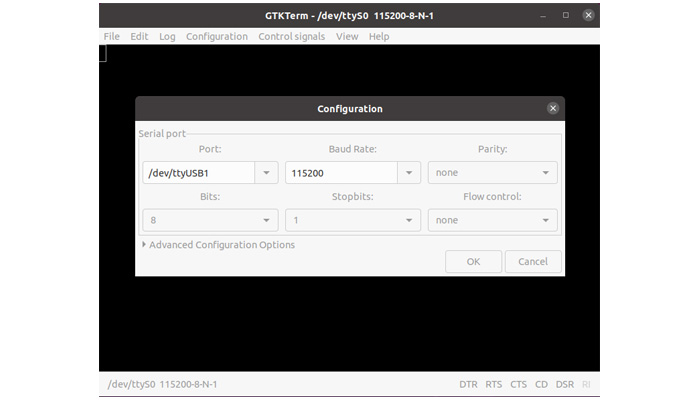
In this article, the KV260 is operated via serial connection from the host PC. Any application can be used, but GTKTerm will be used for the explanation. Connect the KV260 to the host PC with a USB cable. Then, connect using the following settings
| Parameter Name | Value |
|---|---|
| Port | /dev/ttyUSB1 |
| Speed | 115200 |
| Data | 8bit |
| Parity | none |
| Stop Bit | 1bit |
| Flow Control | none |
The KV260 can also be operated by connecting a monitor, keyboard, and mouse. So if a serial connection is not convenient, the KV260 can be operated directly.
Write Petalinux image, check access
If Petalinux fails to start with the below operation, Please refer to Supplement (Boot FW update) for more information.
- Connect a microSD card with a written xilinx-kv260-dpu-v2022.1-v2.5.0.img to the KV260
- Turn on the KV260
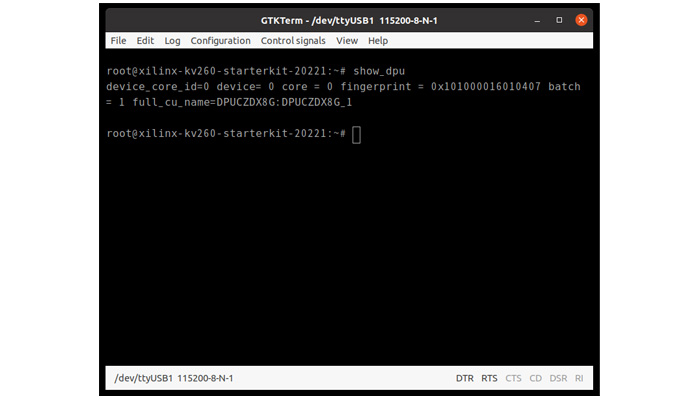
- Serial connection with gtkterm
- Wait for a while as it is an automatic login (no login operation is required)
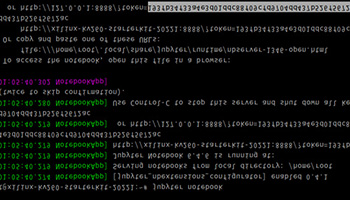
- Execute the command show_dpu command to see if the following is displayed
Summary
We checked the Petalinux image provided by Xilinx regarding how to write it and access it after booting.
The same procedure can be used to write and access other Xilinx-provided images and self-made images.
Supplement (Boot FW update)
Boot FW is causing the 2022 version of the image to fail to boot. If this is the case, please follow the instructions below to update Boot FW. Please update carefully.
Below you will also find the procedure we followed here: Download the 2021 version of the image below.
Unzip the file as below
xz -dv petalinux-sdimage-2021.1-update1.wic.xzWith reference to Exporting Petalinux images with the tool, write down petalinux-sdimage-2021.1-update1.wicto the microSD card.
Then download the following Boot FW.
2022.1 Update3
* The latest information is in Boot Fw Information. If you have a newer version than Update 3, please use that version.
Follow these steps to update Boot FW
- Connect the KV260 to the host PC with a USB cable
- Connect microSD card with image for 2021 to host PC
- Copy BOOT_xilinx-k26-starterkit-v2022.1-09152304_update3.BIN to /media/[username]/root/home/petalinux on host PC
- Connect microSD card to KV260
- Launch KV260
- Make a serial connection with GTKterm and do the following
- Log in : After a short wait, you will be prompted to log in, enter petalinux and a new password.
- FW Update : sudo xmutil bootfw_update -i /home/petalinux/BOOT_xilinx-k26-starterkit-v2022.1-09152304_update3.BIN
- Reboot KV260 and log in again
- FW activation : sudo xmutil bootfw_update -v
After the Boot FW update is finished, please check if Petalinux boots with the 2022 version image.
*All names, company names, product names, etc. mentioned herein are trademarks or registered trademarks of their respective companies.